At Drivy, we make extensive use of pull requests to ensure that our code is up to our standards and to catch possible issues.
Reviewing big pull requests can get tedious, that’s why we try to make them as readable as possible. This means splitting them in small commits that all make sense individually, so you can read the pull request commit by commit and understand the general direction of the code change.
It’s also useful if you want to only show a part of your PR to some people. For instance, you might want the front-end developer to only look at the front-related commits.
In a perfect world, you’d come up with a plan on how you want your PR to be split into commits, work on each commit sequentially, then submit your PR.
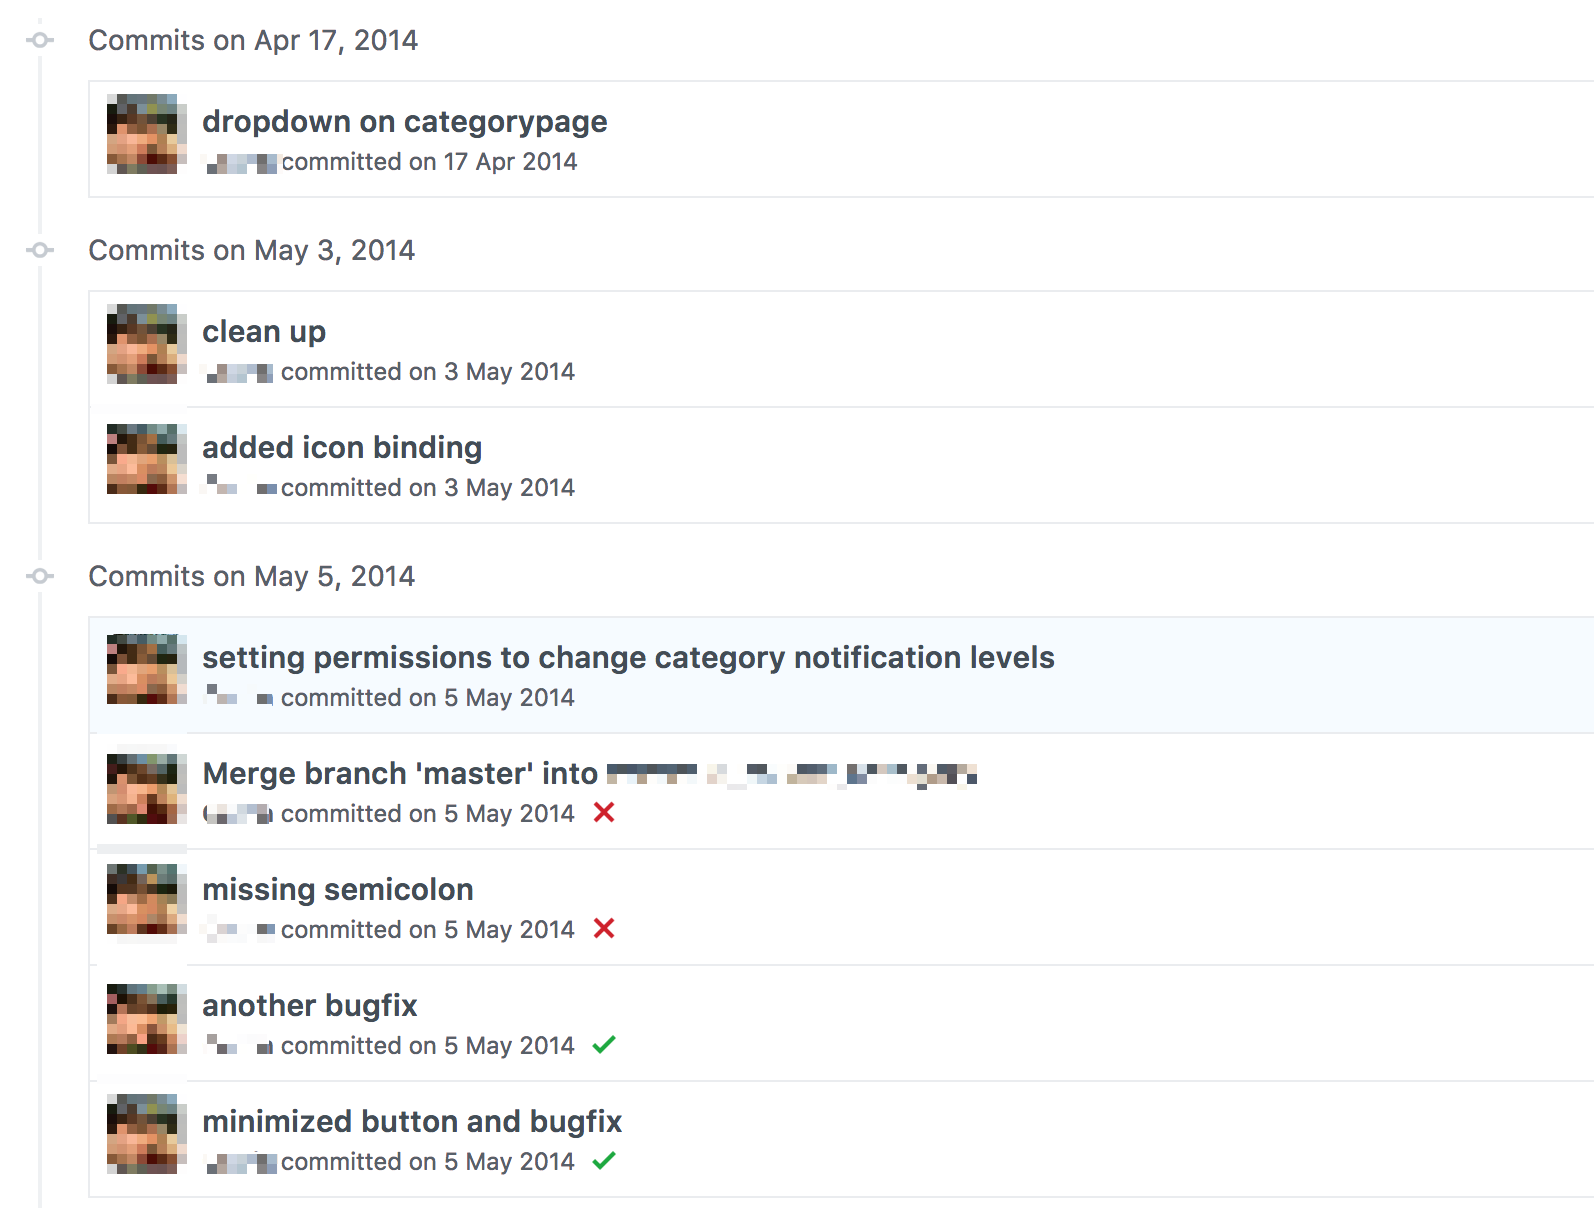
Unfortunately, this is not the world we live in, and more often than not, mistakes happen and your history quickly looks like this:

Thankfully, git is super powerful and allows to rewrite history, thanks to the dreaded git rebase command.
Git rebase has many usages. The main idea is that git rebase is used to apply a bunch of commits on top of a different base.
In this article I’ll focus on one use case we can encounter when trying to submit a readable PR: editing past commits.
Let’s imagine we’re building a car sharing platform ;) We’re working on a big redesign of the “new car” form and our history looks like this:

So far so good! But we just realised that we forgot to update a wording.
The commit is already far back in the history so we can’t use git commit --amend.
We could create another commit but wouldn’t it be much better to edit our “update wordings” commit as if we never forgot this wording to begin with? Let’s use git rebase to achieve just that.
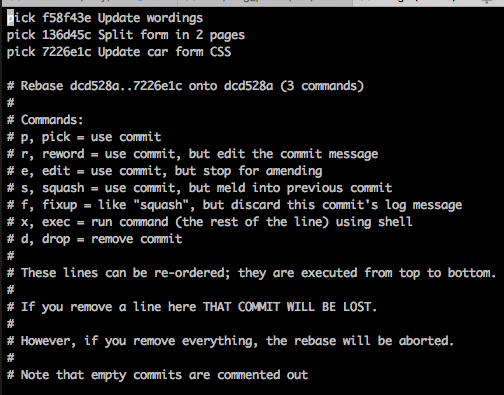
We’re going to run git rebase -i master, meaning that we want to reapply our commits on top of master, but in interactive mode (-i). This will allow us to play around with each commit :

Here, git opens our favorite text editor and asks us what to do with each commit.
By default, pick will just apply the commit, but we can update each commit line to tell another story. We can also reorder the lines to have the commits applied in a different order.
In our current use case, the command that we want is edit, if we replace pick by edit on a commit line, when applying the commit, git will halt and yield control to us so we can do whatever we want.
Let’s do it!

Now let’s just save the file and quit our editor.

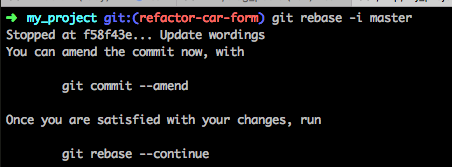
We’re now back to when we commited this first commit, the 2 others haven’t been applied yet, and we can now do our changes.
When we’re happy with our changes, we can add them and run git commit --amend to update the commit.
Afterwards, we have to run git rebase --continue to continue with the rebase and apply the next commits.
In the end, we’ll keep our 3 commits, but the one we edited now contains our latest changes.
Our history is clean, ready for review!
git rebase is super powerful, especially with its interactive mode. You can use it to do many things: reorder commits, merge commits together, edit past commits, split commits in several commits, remove commits completely, etc. If you want to know more about it, have a look at the official documentation.
But as you know, with great power comes great responsibility. Rewriting the history could cause harm if you’re working on a shared branch and other developers are pulling your code, keep that in mind!
Before ending this article, here’s a last piece of advice: if you find yourself lost in a git rebase -i session and just want to return to the state before ever trying to rebase, the command you’re looking for is git rebase --abort.
Happy rebasing!